Design Your Own Golf Cart Wrap
Not sure what wrap you want? Turn an idea or photo into custom AI artwork, then match it to your roof, seats, wheels and windshield in 3D.
Golf Cart Wraps Team · Editorial team · · 13 min read
You can design your own golf cart wrap online by picking your cart body, describing a look or uploading a reference photo, and letting AI create finished artwork directly on the panels. Spin the 3D cart to judge every side, match the roof, seats and wheels, and export the finished design in HD without touching Photoshop.
Most owners know they want their cart to stand out, yet stare at a blank screen because they do not know what exact wrap they want yet. Start with a rough mood instead: a breezy coastal cruiser, a crisp patriotic stripe, or an understated trail camo build. Comparing real AI variations on your own cart model makes the decision obvious in minutes.
Previewing designs and tuning your 3D cart cost nothing. A text AI concept costs 10 credits, a photo-reference AI concept costs 20 credits, and unlocking watermark-free HD 3D views plus the flat wrap sheet costs 30 credits. The Starter pack is $9.90 for 200 credits, which never expire. This guide walks through every step in the order that saves rework.
Start With Your Golf Cart Body
Your golf cart body sets the proportions for every graphic decision that follows. Pick the closest model before generating artwork so you see how shapes behave on the cart you actually park in your garage. Our 3D designer includes 34 body configurations across E-Z-GO, Club Car, Yamaha, Evolution, ICON, Bintelli and Denago EV.
Pay close attention to the nose shape, side skirt length and wheel arch openings. A compact two-passenger Club Car Onward or E-Z-GO Freedom RXV carries shorter side panels where bold, clean shapes work best. A four-passenger or six-passenger stretched body gives stripes, waves and tropical leaves a much longer horizontal run from cowl to rear fender.
Ride height changes how dark and light zones balance out, too. A lifted trail cart exposes taller tires and a deeper shadow line under the rockers, so a dark lower accent ties the body visually to the wheels. On a standard neighborhood cruiser, bright lower bodywork keeps the stance light and crisp against pavement.
Spin the bare cart once before touching the palette. Notice where the cowl tapers toward the windshield struts, where the step cutout breaks the side panel, and how much rear body actually faces traffic behind you. Knowing those landmarks up front stops you from placing a crest or family name right across a tight body crease.
If your exact year or trim sits between generations, pick the closest body outline from the same manufacturer first. Most visual wrap decisions depend on hood angle, side panel height and wheel clearance rather than tiny mechanical changes underneath the seats. Starting on the matching silhouette keeps your scale honest from minute one.
Golf Cart Wraps 3D catalog, November 2026 (34 body configurations total).
Turn a Blank Page Into AI Wrap Ideas
AI wrap generation solves the hardest moment of any custom build: getting a real, finished design onto your cart when all you have is a loose idea. Type a plain sentence or attach a photo, and the AI draws custom wrap and decal artwork tailored directly to your cart panels. You react to concrete looks on screen instead of guessing from tiny swatch chips.
Strong text prompts cover three details: mood, two or three main colors, and a primary motif. Adding a quick placement note sharpens the result even more, such as sweeping teal waves along both sides with a calm navy front cowl. Vague requests like "make it cool" hand every visual choice back to chance, while a two-sentence brief produces focused concepts right away.
Reference photos work when the look you want is easier to show than describe. Upload a sunset beach photo, a favorite fabric pattern, a college color banner, or a snapshot of your truck or boat so the cart matches the rest of your driveway. The AI pulls the palette and rhythm from your reference and translates it into clean wrap artwork shaped for the cart body.
Test ideas by changing one variable per generation. Keep a coastal navy-and-cream palette while swapping palm fronds for geometric contour lines, or keep the patriotic stripes while switching from bright crimson to muted distressed red. Every generation stays saved in your workspace so you can click back and forth between favorites until one design immediately wins.
Watch how the AI handles open breathing room around the front cowl and wheel openings. If an early concept looks great on the side skirts yet feels overly dense on the nose, mention a quieter front panel on your next prompt. Two focused iterations almost always beat ten random prompts thrown at the screen.
Semrush US keyword data, October 2026 snapshot.
Coastal resort
Create a coastal resort golf cart wrap with soft turquoise waves, sandy cream panels and subtle navy palm leaves. Keep the front cowl clean and carry the waves along both sides.
Produces
- A relaxed beach palette
- A flowing side motif with room for a name
Pitfalls
- Too many competing beach motifs can crowd compact panels.
Bold patriotic
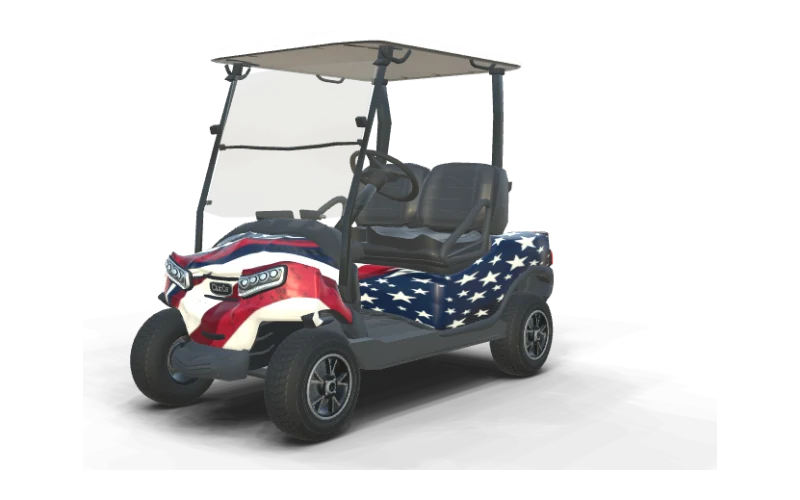
Design a bold patriotic golf cart wrap with deep navy, bright red stripes and white stars. Sweep the stripes toward the rear and leave a clean area for a family name.
Produces
- Strong red, white and blue contrast
- Clear space for personalization
Pitfalls
- Small stars can get lost beside oversized side lettering.
Modern trail camo
Create a modern trail camo golf cart wrap with charcoal, olive and muted tan angular shapes. Use a dark lower section and a restrained pattern across the cowl and sides.
Produces
- An earthy trail palette
- Cohesive shapes across cowl and skirts
Pitfalls
- Similar dark shades can blend together from twenty feet away.
Use the Wrap Sheet and 3D Preview Together
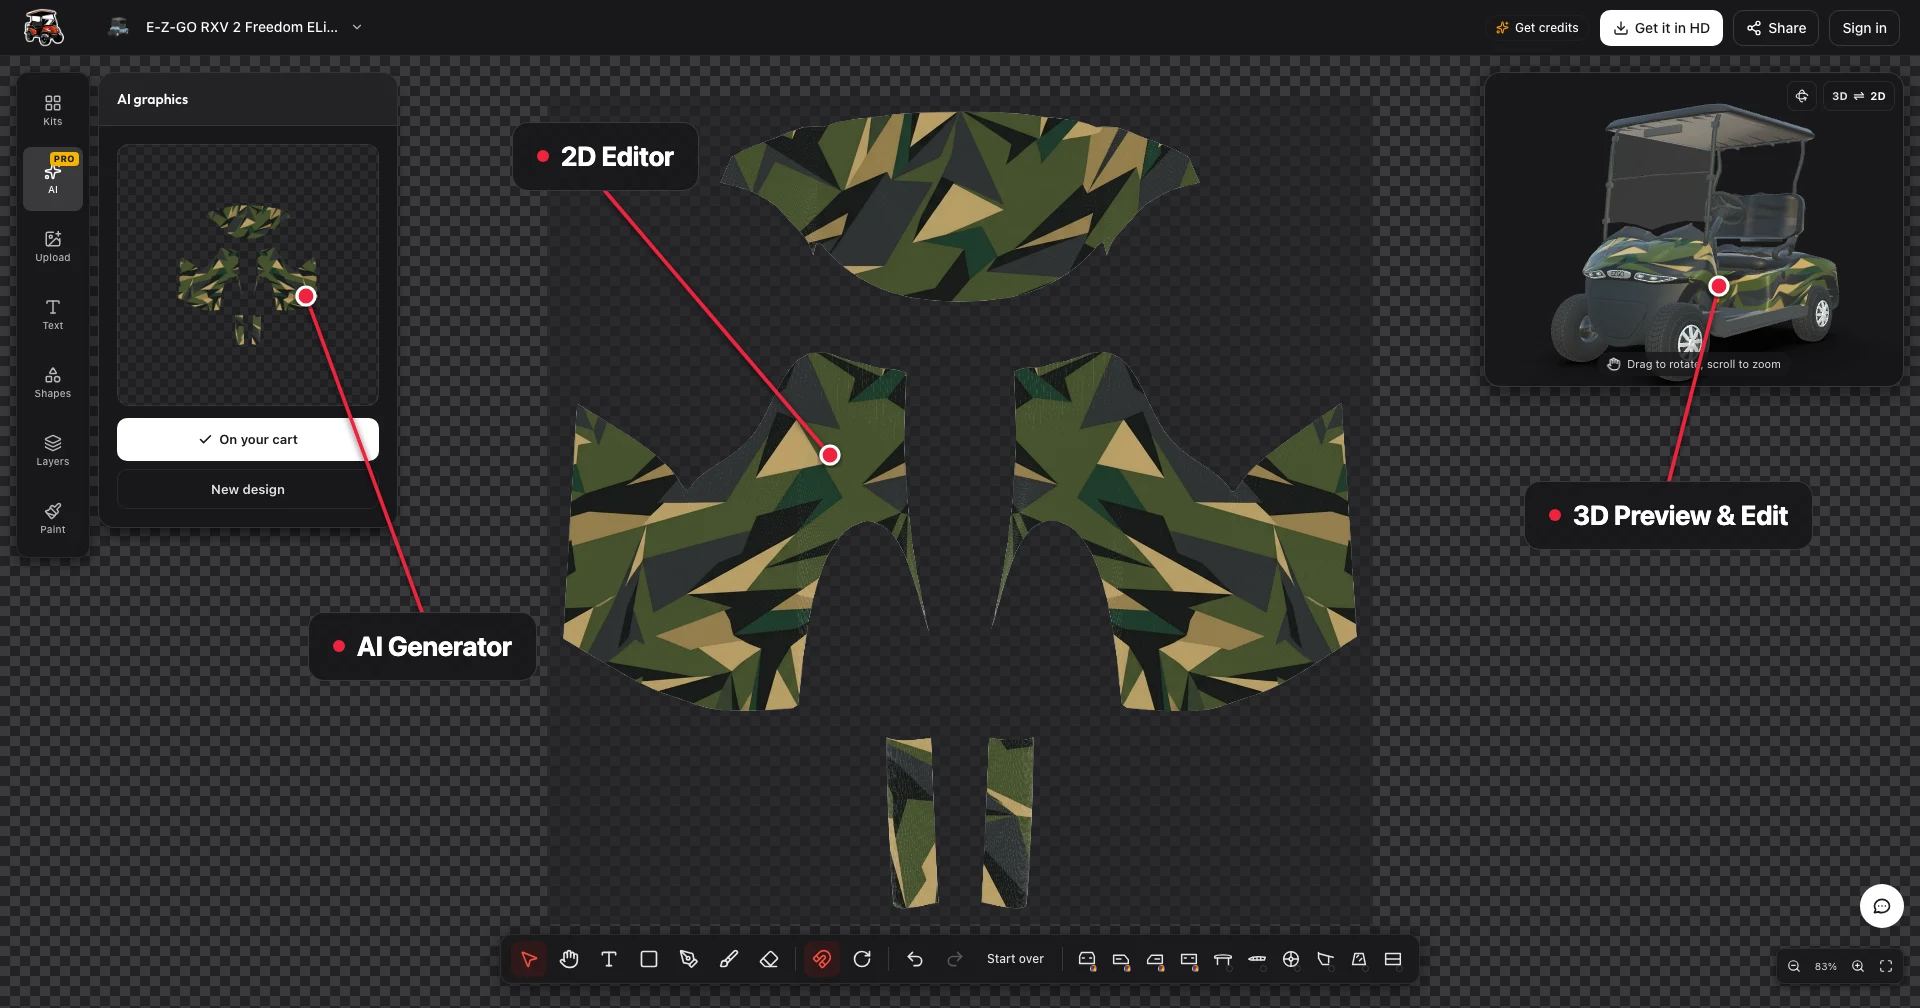
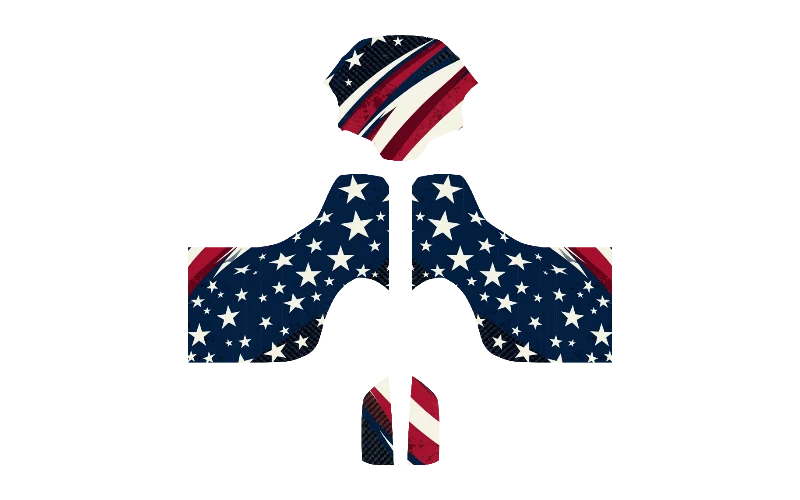
Working with the unfolded whole-cart wrap sheet beside the live 3D cart gives you control over both macro layout and fine placement. The flat sheet lays out the curved front cowl, mirrored left and right side skirts, and rear body on one unified canvas. Every move, resize, or brushstroke updates the 3D cart instantly.
Treat the flat sheet as your alignment bench. Because left and right sides sit mirrored at a shared scale, you can line up stripes, gradients and geometric angles so both flanks carry the exact same rhythm. Then drag the 3D view around the front wheel arch and rear quarter to verify how those flat lines bend over real compound curves.
A common mistake is designing zoomed in on one panel at a time. A pattern that looks sharp at close range can feel chopped off once you see the whole cart from twenty feet away. Pull the 3D camera back to street distance after every major edit and make sure the eye reads one clear main motif first.
Work from large shapes down to small accents. Lock in your base wrap artwork first, check how the cowl flows into the side skirts, and only then bring in stripes, badges or custom lettering. That sequence prevents you from shifting text five times whenever you tweak the main graphic underneath.
Use the built-in 2D layer stack when combining elements. Keep your main AI wrap on the bottom layer, lock or leave it untouched while experimenting with side stripes or custom crests on upper layers, and toggle layer visibility on and off to see whether a new detail genuinely improves the cart or simply adds clutter.
- 1Pick your cart body
- 2Generate AI wrap concepts or load a starter
- 3Refine layout on the flat wrap sheet
- 4Coordinate roof, seats, wheels and tint
- 5Add names, numbers and logos
- 6Check finish and export in HD
Choose a Starter Style or Build Your Own
You never have to start from a blank white cart if you prefer reacting to a finished look first. Our starter library includes Geo Camo, Stars & Stripes, Miami Palms, Coastal Current, Contour Lines and Fairway Green across all 34 models. Clicking any starter wraps your chosen cart immediately so you can judge scale, flow and contrast on real geometry.
Starters also serve as fast style tests. Load Miami Palms on a Yamaha Drive2 or ICON i40 to see whether saturated tropical colors energize your cart or clash with a dark roof. Switch to Contour Lines or Fairway Green a second later to compare a calmer neighborhood aesthetic side by side.
Once a starter narrows down what you enjoy, switch to the AI panel to create a one-of-one version nobody else in your community owns. You might like the clean energy of Coastal Current yet want coral accents and a sunset horizon, or love the sharp facets of Geo Camo in navy and slate gray instead of woodland green.
A smart habit is pairing one ready-made starter against two custom AI runs before deciding. That three-way comparison usually reveals within five minutes whether you want bold full-body graphics, directional racing stripes, or a cleaner base color with sharp side decals.
You can also treat any starter design as a launchpad rather than a fixed box. Open Contour Lines or Fairway Green, dial down the background saturation or tint the base body color underneath, and layer your own custom stripes, house number or golf club crest right over the existing layout.
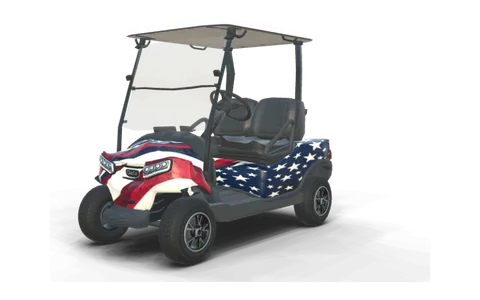
Club Car Onward 2 Passenger Wrap
Standard, ride height, two seats, gas, Glacier White
See how Stars & Stripes follows the Club Car cowl and side skirts, then customize the look in 3D.
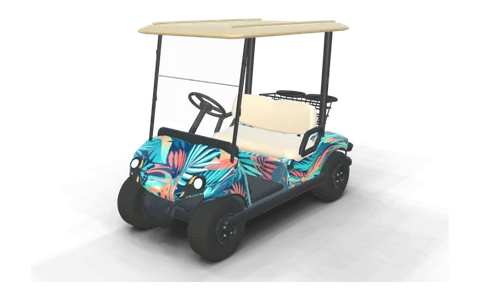
Yamaha Drive² PTV QuieTech EFI Wrap
Two, seats, gas, Glacier White with Stone roof
Try Miami Palms on a Yamaha body and compare its bright palette with your roof and seats.
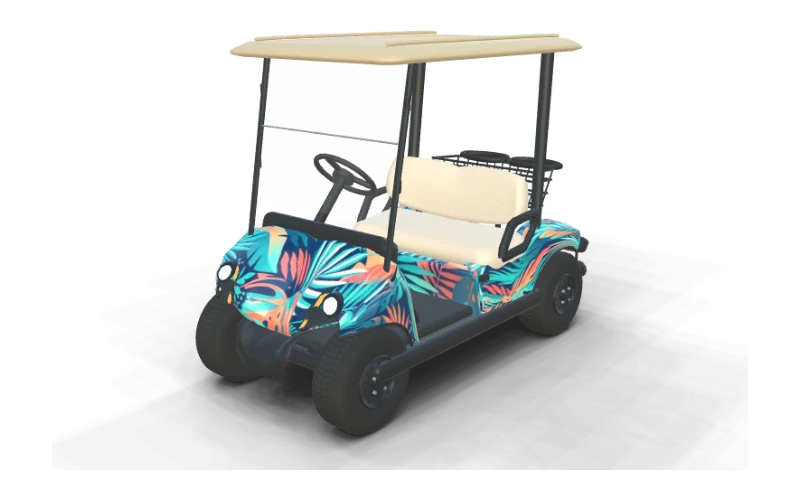
Match the Wrap to Your Roof, Seats and Wheels
A golf cart wrap never sits in isolation. Above the body sits a large canopy roof and windshield; inside sit two or three rows of seats; underneath sit four wheels and dark bumper trim. Coordinating all 10 customizable zones on the 3D cart prevents the classic mistake of designing a great wrap that clashes with the hardware already bolted to your cart.
Start with the canopy because it occupies the biggest solid block above eye level. A crisp white roof opens up navy coastal waves and bright tropical greens, while a matte black roof sharpens red patriotic graphics and dark geometric camo. Tan roofs naturally anchor olive, khaki and cream builds.
Next, dial in the seats through the hardware dock. You can adjust the main seat cover, center insert and contrast piping separately to echo one accent from your wrap. White seats with navy piping tie a beach cart together cleanly, while saddle tan seats warm up woodland camo or fairway green panels.
Finish with wheels, frame trim and windshield tint. Matching dark rims with a smoked windshield pulls a modern dark build into one cohesive stance, whereas machined silver wheels and a clear windshield keep a resort cruiser bright and welcoming. Click any part directly on the 3D cart or pick it from the dock to swap colors live.
When you want a clean reset after trying wild hardware combinations, hit Start Over to restore the stock cart parts and original body paint in one click. That makes it easy to test risky roof or wheel upgrades without losing track of how your real cart sits in the garage today.
- Body wrap panels (Front, Left, Right, Rear)40%
- Exterior hardware (Roof, Wheels, Frame, Windshield)40%
- Cabin and base finish (Seats, Base paint)20%
Golf Cart Wraps 3D editor zone layout: 4 body wrap areas, 4 exterior hardware parts, and 2 cabin or base paint controls.
Canopy roof
Match your existing roof color first so every wrap color gets judged in real context.
Two-tone seats
Coordinate seat cover, center insert and piping with a subtle repeat of your wrap accent.
Wheels and frame trim
Balance bronze, matte black or machined silver rims against the lower edge of the wrap.
Windshield tint
Toggle clear, light smoke or dark tint and inspect the front three-quarter view.
Add Names, Cart Numbers and Logos
Personal details turn a good graphic into your cart. Family names, beach house nicknames, neighborhood numbers and club crests belong on top of your main wrap once the big shapes and colors are settled. Leaving a dedicated quiet zone during your AI prompt or layout tweak keeps text effortless to read.
Contrast beats raw font size every single time. Medium-sized white lettering with a thin dark outline over deep navy reads cleanly from across a cul-de-sac, whereas huge pale yellow text over sandy cream disappears in bright sun. Zoom the 3D cart out until it fills a quarter of your screen to test real-world readability.
Match each graphic to the panel geometry. The front cowl is compact and curved, making it the right home for a two-digit cart number, short monogram or compact badge. Long side skirts carry a full family name, street name or estate script without cramping the letters near a wheel opening.
When uploading a family crest, country club logo or custom artwork, use a PNG file with a transparent background so your wrap flows cleanly right behind the mark. Each uploaded graphic stays on its own editable layer, letting you nudge scale, rotation and position independently on both sides so lettering always reads left to right.
Front cowl
Reserve the nose for a crisp cart number, monogram or compact crest with clear breathing room.
Side panels
Place full family names or neighborhood titles along the flattest mid-section of each side.
Transparent PNG logos
Upload clean transparent artwork so no awkward white rectangle sits over your wrap.
Check both the driver side and passenger side in 3D after adding lettering. Symmetrical graphics mirror naturally across the cart, while names and numbers should always read left to right from outside.
Compare Gloss, Matte, Chrome and Holographic
Changing the surface finish transforms the exact same artwork more than most owners expect. Gloss delivers a deep, painted shine that makes saturated tropical blues, reds and whites pop in afternoon sunlight. Matte absorbs glare and turns the exact same colors calm, modern and purposeful.
Chrome turns panels into a mirror-like metallic surface, which amplifies clean geometric lines, racing stripes and bold black lettering. Because strong reflections already create plenty of visual energy, chrome builds look sharpest when the artwork stays simple rather than packed with tiny textures.
Holographic introduces an iridescent color shift as you orbit the cart. Pair it with crisp dark shapes, bold negative space or clean silhouettes so the shifting sheen acts as a spotlight instead of competing with busy background details. Rotate the 3D cart slowly under the studio lights to watch how highlights travel across the hood.
Before altering a palette you almost love, toggle all four finishes on the live 3D model. A woodland camo design that feels noisy in high gloss often locks into place the second you flip to matte, while a classic coastal stripe comes alive in gloss.
| Finish | Visual character | Best color pairing | Ideal cart style |
|---|---|---|---|
| Gloss | Bright, wet reflection with crisp color pop | Navy and white, coral and teal, red and white | Coastal cruisers, patriotic and resort carts |
| Matte | Flat, glare-free and understated | Olive, charcoal, khaki tan and satin black | Lifted trail carts, hunting and tonal camo builds |
| Chrome | High-mirror metallic sheen | Black with gold or bold two-tone stripes | Show carts and modern geometric themes |
| Holographic | Angle-shifting iridescent movement | Crisp black motifs over open negative space | Statement neighborhood and custom night builds |
Golf Cart Wrap Cost and Credit Planning
Traditional custom graphic design fees often start at a few hundred dollars before you ever see more than two mockups. Testing directions yourself with AI flips that math: you explore dozens of color combinations, prompts and hardware pairings on your own schedule for a flat one-time credit pack with zero subscriptions.
Designing manually, browsing all 34 models, swapping starter styles and adjusting every 3D hardware zone are completely free. You spend credits only when you generate new AI artwork (10 credits for a text prompt, 20 credits from a reference photo) or unlock a watermark-free HD export (30 credits).
Even the entry Starter pack ($9.90 for 200 credits) covers 17 text AI concepts plus 1 complete HD export, or 5 photo-reference concepts plus 3 HD exports if you want to compare finalists with family. Larger packs lower your per-credit cost and include bonus credits plus expanded cloud saves for multi-cart garages.
Every pack credit stays in your account permanently with no monthly renewal. If you finish one cart this spring and want a fresh look or a second cart design next year, your remaining balance is still waiting.
Cloud saves scale right alongside each pack so you can keep seasonal variations, holiday parade looks or separate designs for a four-seat family cart and a lifted utility cart organized under one login. Opening a saved build restores both the flat wrap sheet layers and all 10 3D hardware settings exactly where you left them.
Golf Cart Wraps pricing, November 2026. Credits never expire and require no subscription.
| Pack | One-time price | Total credits | Bonus included | Cloud designs |
|---|---|---|---|---|
| Starter | $9.90 | 200 credits | Base pack | 20 saved designs |
| Pro | $19.90 | 550 credits | +50 bonus | 60 saved designs |
| Max | $39.90 | 1,200 credits | +200 bonus | 200 saved designs |
| Ultra | $69.90 | 2,500 credits | +500 bonus | 500 saved designs |
Check Your Design and Export in HD
Run a quick five-point check before clicking export. First, orbit the 3D cart slowly through front, left, right, rear and overhead three-quarter angles so no hidden corner surprises you. Second, verify that your roof, seat piping, rims and windshield tint still complement the wrap instead of pulling focus away.
Third, inspect the unfolded wrap sheet at full width. Make sure crests, family names and striping sit comfortably inside the panel shapes with even margins around the edges. Fourth, test both sides at zoomed-out distance so you confirm the main motif and lettering remain sharp at twenty feet.
Fifth, if you are torn between two finalists, save both to your account and download the free watermarked preview to compare side by side on your phone in daylight. Once the winner is clear, unlock the 30-credit HD export for watermark-free 3D renders and the high-resolution flat wrap sheet.
Keep both the 3D renders and flat sheet together in one folder. The 3D views show friends, family or your club exactly how the completed cart looks from every side, while the flat wrap sheet preserves every layer of your custom artwork cleanly for future tweaks or fresh variations.
Design Your Own Golf Cart Wrap Questions
Yes. Pick your cart configuration and describe the look you picture in everyday English, or upload a reference photo. AI builds custom wrap artwork directly on your cart panels, and you refine colors, hardware and personal lettering in the browser.
A text AI wrap design costs 10 credits, and a design guided by a reference photo costs 20 credits. The Starter pack is $9.90 for 200 one-time credits that never expire.
The 30-credit HD export unlock gives you watermark-free high-resolution 3D views of your cart plus the unified flat wrap sheet showing your artwork laid out cleanly.
Yes. Choosing a cart, loading starter wraps, customizing roof, seats, wheels and windshield tint in 3D, and downloading a watermarked preview are all free.
The 3D designer includes 34 body configurations across E-Z-GO (11), Club Car (7), Yamaha (6), Evolution (3), ICON (3), Bintelli (3) and Denago EV (1).
Name a mood, two or three colors, one main motif and a simple placement hint. For example, ask for navy and cream coastal waves sweeping toward the rear with a clean front cowl for a cart number.
Yes. Upload a photo of a beach scene, fabric pattern, truck or favorite graphic, and the AI creates original wrap artwork shaped for your cart panels for 20 credits.
Yes. Place text layers cleanly on each side and orbit the 3D cart to confirm both sides read left to right from outside with clear contrast behind every letter.
A sharp PNG with a transparent background works best because your wrap artwork shows right up to the edges of your emblem instead of sitting behind a solid white rectangle.
Yes. Use the 3D hardware dock to set canopy color, two-tone seat cover, insert and piping, wheel rim finishes, frame trim and windshield tint right alongside your wrap artwork.
Sources
- Golf Cart Wraps 3D Designer Catalog (34 models across 7 makes) (accessed 2026-11-21)
- Golf Cart Wraps Pay-Once Credits and Export Pricing (accessed 2026-11-21)
- Semrush US Keyword Magic Database (golf cart wraps and ideas cluster, October 2026 snapshot) (accessed 2026-11-21)
- Club Car Onward Personal Golf Cart Configurations (accessed 2026-11-21)
Golf Cart Wraps Team
Editorial team
We build the 3D golf cart wrap designer on this site and write practical guides on scaling patterns, placing decals and previewing panels before saving your design.
Find the wrap that feels like yours
Describe your idea or add a photo, customize your 3D cart, and export your finished wrap in HD.
Start designing